How to use 3D Builder on Windows 10
3D Builder can help you to build and 3D print just about anything.
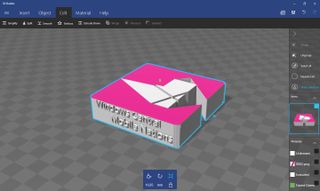
3D Builder is an app that comes baked in when you install Windows 10. While it's a bit innocuous, if you have even a passing interest in 3D printing, then it is well worth your time to investigate. 3D Builder lets you build your own custom prints for 3D printing, without having to know how a CAD program works in the progress. It makes creating new files easy enough that just about anybody can do it, and even allows you to order your print online if you don't have access to a 3D printer at home.
What is 3D Builder?
3D Builder is an app that allows you to build or import files to be used in 3D printing. Previously, to create a file for 3D printing you would need to have some serious CAD know how. 3D Builder removes that from the equation. You can import images you find online, or build the print from within the app using the various tools made available to you.
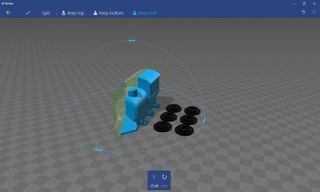
We really can't overstate how awesome this is. This makes 3D printing far more accessible to everyone, and allows you to easily customize any print. You also get access to a catalog of prints, all of which can be saved and printed directly or edited and adjusted as you see fit. This includes duplicating the number of items in a print, slicing it, embossing words and plenty more. Microsoft has done a stellar job of making sure that 3D Builder is easy to use, and that just about anyone can use it without much hassle.
Using 3D Builder
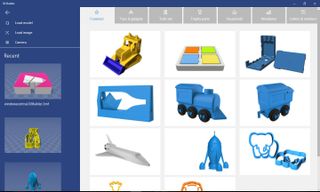
When 3D Builder opens up you'll see a catalog of prints you can use and customize on the right side of the screen, and a small list of options on the left side of the screen. From here you get started with adjusting an existing print, or creating a brand new one of your own. It's here that you can load an image saved onto your computer as well.
By selecting an existing print, loading a saved image, or clicking on new scene, you'll be taken into a screen where you can adjust your print. A 3D rendering of the print. At the top of the screen is a menu bar that has the different ways you can customize your print. Insert, allows you to insert further items into your print. Object, allows you to fine tune the objects in your scene or duplicate them. Edit, will open up options to add words to the print, or split it in half.
Much like using a program like Photoshop there is just a ton to do within this program. You can slowly tweak and adjust a single print until it's perfect, or try to build something from scratch. Likewise, while it is a fairly simple program to learn, it's much more difficult to master. There are enough options to keep you occupied for quite a while even if you decide not to print anything.
Print your model
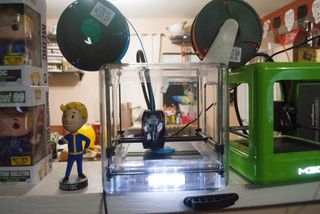
If you do want your model printed, then there are two options available. If you have access to a 3D printer, then things are very simple. Take the file that you want to 3D print, and click save as from the overflow menu on the upper left side of the screen. From there you'll want to save your files in an .stl or .obj file. From there you just need to open it in your 3D printing software and you're ready to print.
Get the Windows Central Newsletter
All the latest news, reviews, and guides for Windows and Xbox diehards.
Your other option is to pay for a print of your model. This option is built right into 3D Builder, all you have to do is click the icon on the upper right of the screen. This will open a series of dialog boxes which will direct you to a 3D printing company. If you don't have access to your own 3D printer, this may end up being your best option.
