How to do a clean setup of your brand new Windows 10 computer
If you live in the United States or in another country that have Black Friday and Cyber Monday, you probably took advantage of great deals to get a brand new computer.
In the US and Canada, Microsoft even has its 12 Days of Deals, which unlike Black Friday or Cyber Monday, the company offers a new deal every day on the first 12 days of December.
Whether you bought your brand new Windows 10 PC in your local store or online in this guide, we're going to help you to set up your new device.
In this setup guide, we'll go through doing a clean installation of Windows 10, get the operating system and drivers up to date, set some common configurations to make your computer more personal and productive. We'll also show how to protect your data from a system failure by making a full backup.
Starting clean
Seeing Lenovo, Samsung, and recently Dell as some of the manufacturers putting customers at risk by adding potentially harmful code to their devices, it's becoming harder to know which company to trust, as such it's a good idea to do a clean installation of the operating system on your new computer whenever possible.
Note: If you have purchased a "Signature Edition" computer from the Microsoft Store, you can probably skip this step, as the purpose of a service is to have a fast and clean computer from the beginning.
If you choose to go through a clean installation route to start from scratch knowing exactly what will be included in your brand new computer, there are a few things you want to do before proceeding:
Get the Windows Central Newsletter
All the latest news, reviews, and guides for Windows and Xbox diehards.
- Make sure your new computer is working correctly
- Make sure your copy of Windows 10 is activated
- Identify which edition of the operating system came with your device
- Download all the latest drivers
- Get your machine product key
Step 1
Instead of erasing your new computer's hard drive from the beginning, you want to make sure that the device is working properly. You can do this by going through the initial out-of-box experience (OOBE) as you would with any other device. Then simply make sure your display, keyboard, mouse, network adapter, other hardware, and peripherals are working correctly.
Step 2
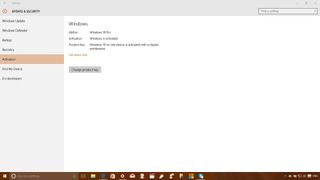
The next step is to make sure your copy of Windows 10 is activated. Simply use the Windows + I keyboard shortcut to open the Settings app, go to Update & security, and under Activation take a look at the activation status.
Step 3
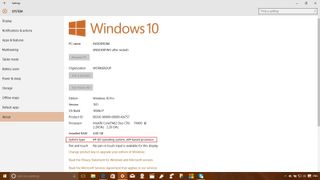
Once, you know Windows is activated, go back to the main Settings page, get into System, and under About make note of your edition (e.g., Windows 10 Home or Windows 10 Pro) and system type (e.g., 64-bit or 32-bit).
Step 4
Now, it's the time to download the drivers onto an external USB drive that you can use to reinstall drivers after the clean installation of Windows 10 as necessary.
There are various ways to obtain your computer drivers, sometimes manufacturers create a "Drivers" folder on the main hard drive, which you can copy to an external drive. However, your best bet is to download the latest drivers available from your computer's manufacturer support page.
Here are a few links from popular brands:
Additionally, if you have a gaming rig running on specific graphic card, you may also want download and install the latest drivers from graphics manufacturer:
Step 5
It's important that before you reformat your computer, know your Windows 10 product key just in case something goes wrong and you need to reactivate.
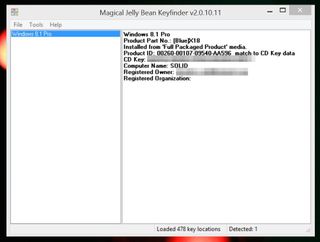
If the product key didn't come with the packaging and there isn't a sticker attached to your device, even though the key can be recorded in the BIOS, you can use a number of software to retrieve your product key. For example, you can try using Enchanted Keyfinder tool, which is a free tool designed to recover your product key.
Step 6
Now, it's the time to reinstall Windows 10 in your new computer. Yes, you could use the reset feature within Windows to do a clean install, but on an OEM computer, it will restore the factory defaults that includes all the configurations we're trying to avoid.
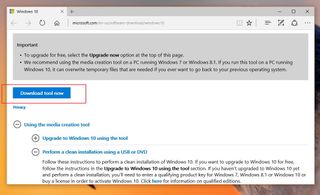
The next step is to download the Media Creation Tool to create a bootable installation media:
1- Go to the Microsoft Software Download page and click the Download tool now.
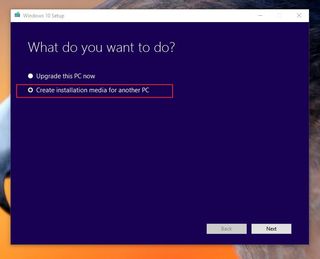
2- Run the Media Creation Tool and select Create installation media for another PC.
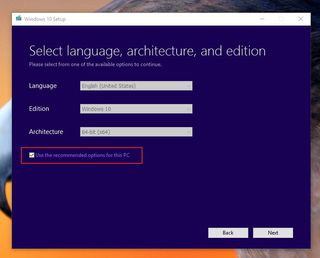
3- Select the language, architecture, and edition, but to make easier you can check the option "Use the recommended settings for this PC," which should select the correct settings for your computer.
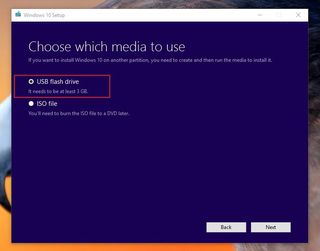
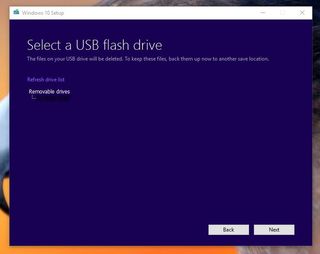
4- Connect a USB flash drive with at least 3GB of free space, choose the option USB flash drive, and click Next.
5- Select the correct removal drive and click Next to complete the process.
Step 7
When you're ready to do a clean install, connect the USB flash drive into the computer, restart your computer and press any key to boot from the installation drive.
If your computer reboots into your current version of Windows, you may need to change the boot order on the BIOS or UEFI settings. Typically, you can access these settings by pressing ESC, Delete, F2, or F12 during boot, but you may want to refer to your computer manufacturer support website for more specific help.
Important: It's worth pointing out that during the following steps you will completely wipe out the hard drive, and you won't be able to restore the computer to the factory default configurations that originally came with the device. It's assumed that you know what you're doing and you have previously created a full backup in case things don't go as planned and you need to roll back.
Once in the Windows 10 Setup do the following:
1- Click Install Windows and then Next.
2- Select Install Windows, and enter your product key if prompted, but you can click the Skip button to this later.
3- Accept the license terms and click Next.
4- At this point, you will get to the Which type of installation do you want? page, select Custom to do a clean installation.

5- On the Where do you want to install Windows? page, select and delete all available partitions until you end up with only one "Unallocated Space".
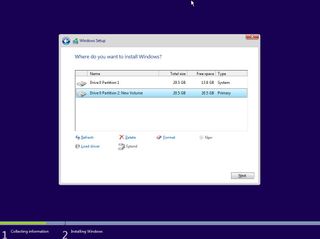
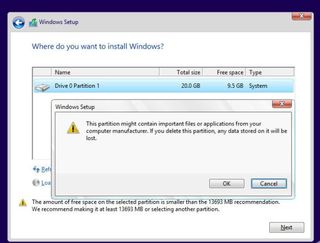
6- Click Next and follow the on-screen instructions to complete the Windows 10 installation.
Getting things ready
Step 1
As soon as you complete the installation, you want to get the operating system updated:
1- Use the Windows + I keyboard shortcut to open the Settings app.
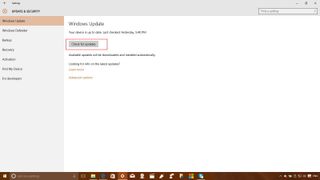
2- Navigate to Update & security > Windows Update, click the Check for updates, and let the operating system download and install all the necessary updates and drivers.
Step 2
You also want to make sure all the drivers are installed correctly in Device Manager. Simply open Start, do a search and open Device Manager. If you don't see any exclamation or red mark, then it's a good sign.
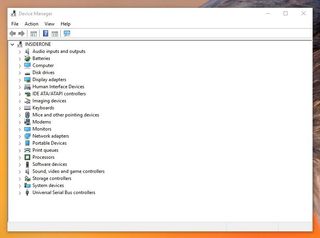
If one of the devices isn't installed properly or it doesn't have any driver installed. You can either go online to your manufacturer's website support or use the drivers you downloaded before the clean installation.
It's good to know that some companies, such as Dell provide software to automatically detect, download, and install drivers.
In case you're setting up a gaming computer, you may also want to replace the graphics driver currently installed with the latest driver provided by the graphic adapter manufacturer.
You can use the links below to download graphics drivers from NVIDIA, AMD, and Intel:
Step 4
Once you have a clean and fast installation of Windows 10, it's time to add some personal customization.
There are endless ways to personalize your computer, but below we'll be listing a few features that you may want to consider configuring in your new Windows 10 PC.
Uninstall pre-configured and suggested apps
Windows 10 by default installs a number of default apps and might set app suggestions in the Start menu that many customers may consider as advertisement. If you don't like these apps and or suggestions, you can easily remove them using this previous guide.
Configure your computer name
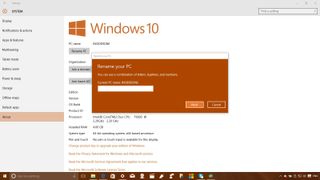
In order to speed up the installation process, Windows 10 will name your computer randomly, but you can change the name at any time by going to Settings > System > About, click the Rename PC, type name you like, click Next, then Restart now to complete the process.
Installing apps on external storage
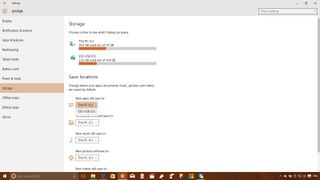
If you bought a device with limited space, you can now install new apps into an external drive. Simply, go to Settings > System > Storage, connect a microSD card or USB drive to your computer, and under Save locations, change the New apps will save to to the drive you just connected.
Set your personalization
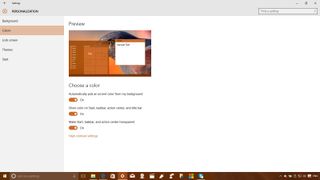
By default, the operating system configures accounts with a dark theme and the Windows 10 default wallpapers. As such, you can go to Settings > Personalization to set your own Background.
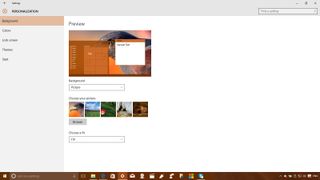
In Colors, you can turn on the "Show color on Start, taskbar, action center, and title bar" to disable the dark theme and more.
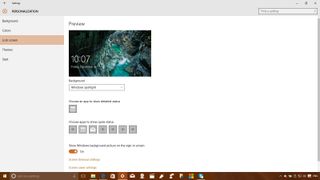
In Lock screen, you can enable Windows Spotlight from the "Background" drop-down menu, choose which apps can show quick status on the screen, and if you don't like the default background in the sign-in screen, you can do it here too by turning off Show Windows background picture on the sign-in screen.
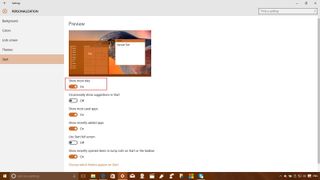
In Start, you can add a fourth row of tiles to the menu by turning on Show more tiles, and a number of other configurations.
Extra: Remember that you can download great Windows themes from the Microsoft website.
Configure PIN password
If you don't want to deal with complicated passwords, you can set a 4-digit pin to sign into your account. Simply, go to Settings > Accounts > Sign-in options, under PIN, click Add, and follow the easy on-screen instructions.
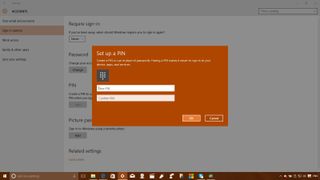
Also, if you don't like your user profile picture you can easily change it while you're in Accounts, and you go to Your email and accounts.
Configure your privacy settings
Windows 10 is an operating system that relies on the cloud, which means that it connects with various online services rising privacy concerns for many users. If this is your case, you can refer to our previous guide to properly configure your privacy settings in Windows 10.
Configure Find My Device
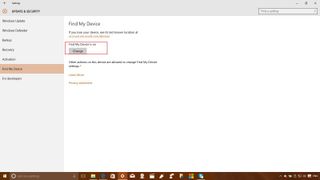
If you constantly forget where you leave your computer or if it ever gets stolen, Windows 10 has a new feature for you. It's called, "Find My Device," and similar to the feature in Windows Phone, it allows Microsoft to save periodically your device location in your online account.
Once you enable the feature by going to Settings > Update & security > Find My Device, clicking Change, and turning the feature On, you will be able to login to http://accounts.microsoft.com/devices and see where your Windows 10 device was last seen, which can really help you recover your device if it ever gets lost or stolen.
Configure Cortana to only respond to your voice
During the out-of-box experience you already enable Cortana, Microsoft digital assistant, but by default the feature will answer to anyone. If you want to personalize the assistant to only answer to your voice, don't forget to launch Cortana, go to the Settings page, turn on Hey Cortana, and pick the option To me, and then click the Learn my voice button to train the assistant to only answer to you.
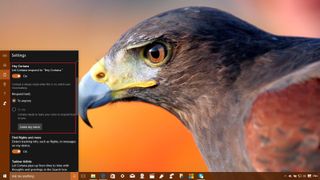
If you want to receive missed calls from your phone, also make sure to have enabled the Missed call notifications option on your computer and on your phone.
Get started with OneDrive
One last thing you want to make sure to configure is OneDrive. Although, Microsoft will soon be limiting the amount of storage you can use as a free and paid customer, the service still a pretty good option to keep documents, pictures, and other files backed up in the cloud and synchronized between computer.
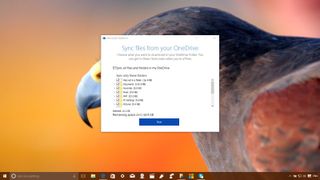
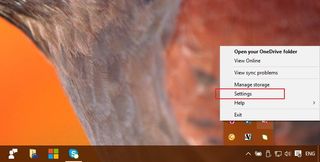
OneDrive will be enabled by default, but Microsoft now uses selective sync instead of placeholders. You need to remember to open the OneDrive app from Start or from the notification area, and specify which folders you want to sync to your device. This is a process you do once per computer, but you can always go back by right-clicking the white cloud icon in the notification area and opening the Settings page.
Here are some additional tips on OneDrive:
- 10 Tips to optimize OneDrive for Microsoft's 2016 storage reductions
- 3 Tips to help you get the most out of OneDrive in Windows 10
- How to overcome the placeholder limitation of OneDrive in Windows 10
- OneDrive
Backing up
Last but not least, we recommend protecting all your data and time you have invested setting up your new computer. The best way to protect your installation, configuration, and data is by making a system image backup.
Fortunately, Windows 10 continues to offer the System Image Backup tool, which can help you create an exact replica of everything stored in your computer.

If you need help creating a System Image Backup, we got you covered! Simply refer to our previous guide.
Wrapping thing up
You've done it! It took a little bit of time, but your brand new Windows 10 PC is now set up and ready to use. Best of all, you know exactly what is included in the installation.
The last thing to do now is to decide, which web browser you want to use: Microsoft Edge, Chrome, or Firefox. It's also a good time to install your favorite applications and security software, if you don't feel that Windows Defender and Windows Firewall will do the job.
Did you get a new computer during Black Friday, Cyber Monday, or during the Microsoft 12 Days of Deals? Do you have a specific way to configure your new devices? Let us know your experience setting it up in comments below.
Mauro Huculak is technical writer for WindowsCentral.com. His primary focus is to write comprehensive how-tos to help users get the most out of Windows 10 and its many related technologies. He has an IT background with professional certifications from Microsoft, Cisco, and CompTIA, and he's a recognized member of the Microsoft MVP community.

