On Windows 10, some classic desktop applications might become blurry during certain scenarios, such as when you're running a remote session, dock or undock, or display settings change. Usually, you need to sign-out and in again to fix the problem.
In order to ease this issue, starting with the April 2018 Update (version 1803), Windows 10 introduces a new option in the "Advanced scaling settings" page that detects and tries to fix blurry apps automatically the next time you open them. However, if the feature isn't working as expected, you can also choose the high DPI settings a particular app should use to override the global settings.
In this Windows 10 guide, we walk you through the steps to change the high DPI settings for classic desktop (win32) apps to allow Windows to automatically fix blurry text and elements with new options available in the April 2018 Update.
How to change scaling settings for classic desktop apps
If you're using a classic desktop app that doesn't render correctly on a high pixel density display, you can fix scaling problems to make it look better using the following steps:
- Open the app you want to fix.
- Right-click the app in the taskbar.
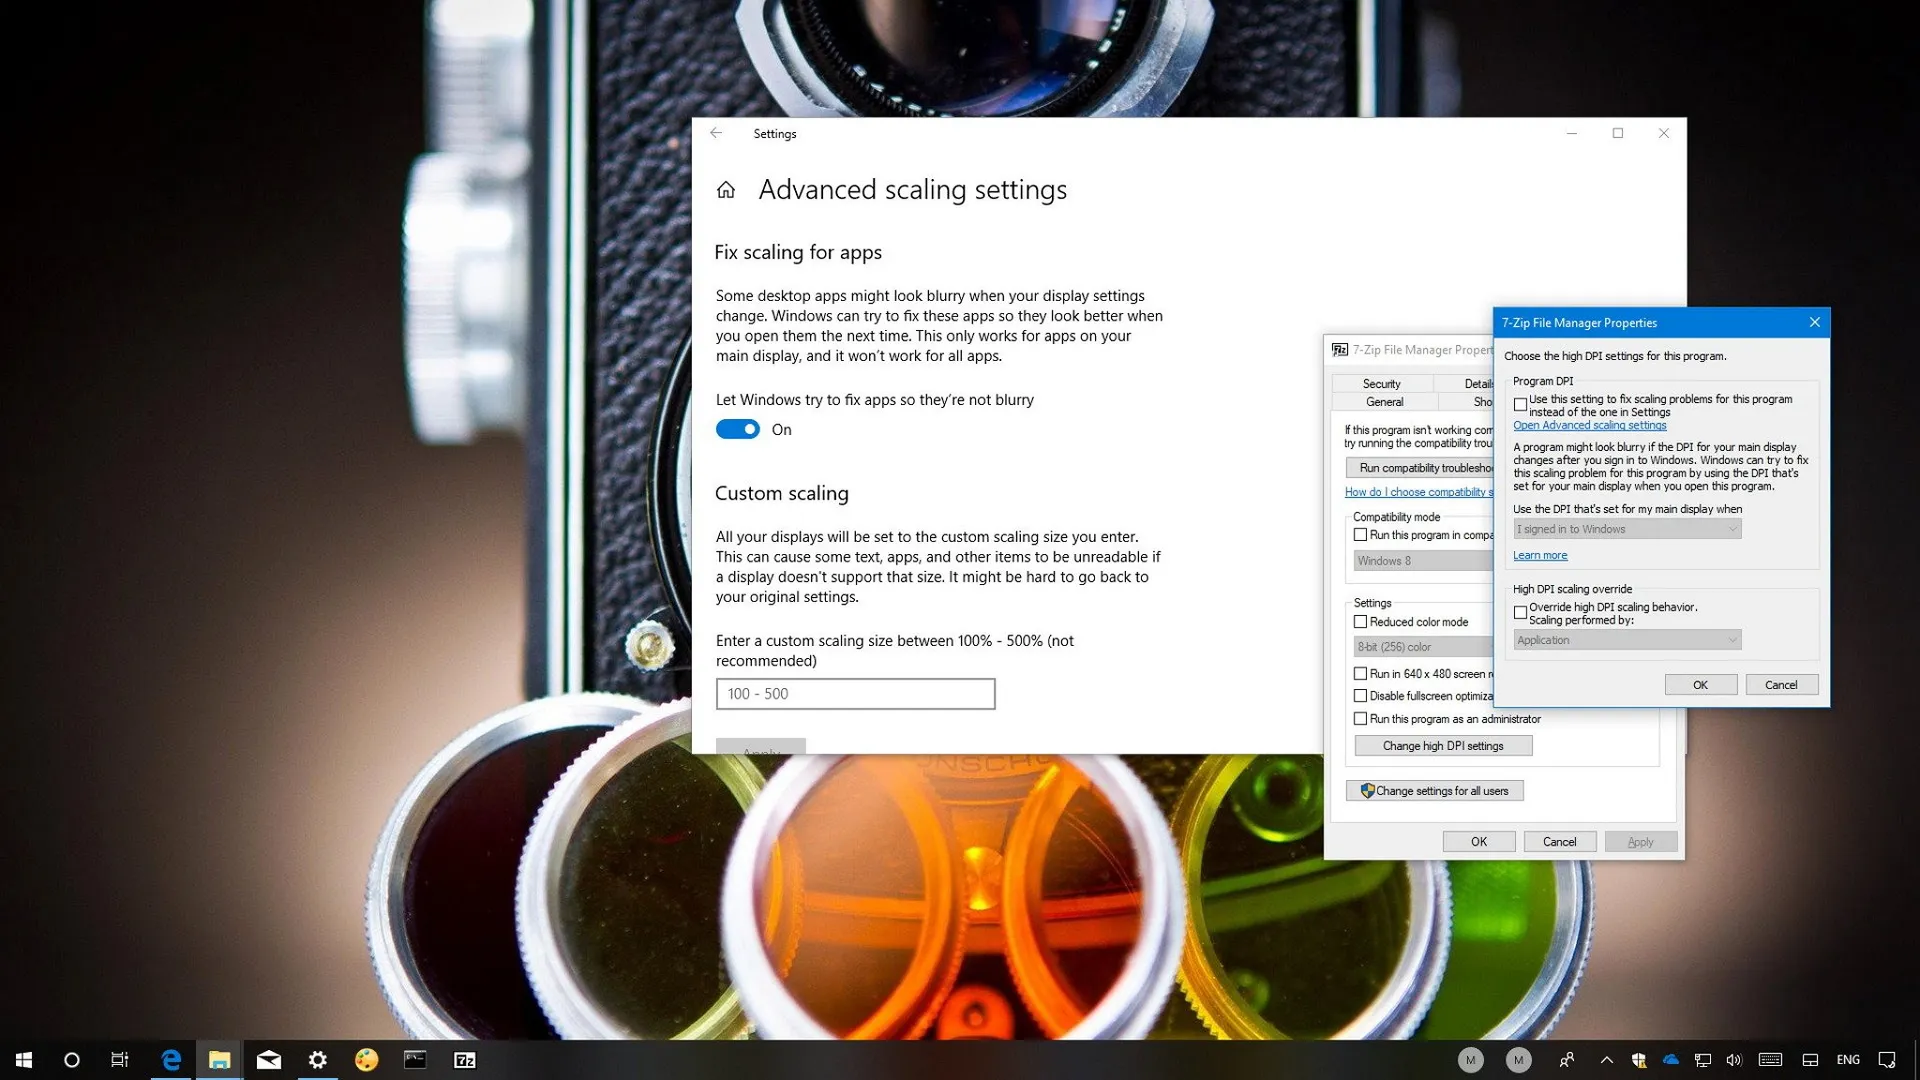
- Right-click the name of the app and select Properties.

- Click on the Compatibility tab.
- Under "Settings," click the Change high DPI settings button.Quick Tip: If you want to apply the settings for all accounts configured on your computer, click the Change settings for all users button, and then click the Change high DPI settings button.

- Under "Program DPI," check the Use this setting to fix scaling problems for this program instead of the one in Settings option.
- Using the available drop-down menu, specify whether an app should use the display DPI settings when you sign in to Windows 10 or when opening the app. (Usually, you want to use the default option.)

- Click OK.
- Click Apply.
- Click OK.
Once you complete these steps, relaunch the app to start using the changes. In the future, if the app becomes blurry, Windows 10 will use the settings you specified to render the app correctly the next time you open it.
Default scaling settings override
It's worth noting that in step No. 5, you can also use the High DPI scaling override options to change the default scaling behavior for a program that is blurry from the very beginning.
After enabling the option, select the System (Enhanced) option using the drop-down menu to make the text and interface look crisper, and resize elements correctly. (Some parts of the app may continue to look a little blurry, but it's still a significant improvement.)
If the "System (Enhanced)" option isn't working on a particular app, you can also try two additional options, including:
- Application — Forces the app to run on a per-monitor DPI awareness.
- System — Stretches the interface, bitmap elements, and text will be blurry. This is how Windows handles scaling by default.

These settings are only available for classic desktop applications, as Microsoft Store apps are already designed to handle high pixel density displays. Also, these new improvements work for apps running on your primary monitor. If you have a multi-monitor setup using different scaling settings and using the extended mode, applications may still look blurry on the other monitors.
More Windows 10 resources
For more helpful articles, coverage, and answers to common questions about Windows 10, visit the following resources:
- Windows 10 on Windows Central – All you need to know
- Windows 10 help, tips, and tricks
- Windows 10 forums on Windows Central

