How to create a Windows 10 account with a custom name using your Microsoft account
Windows 10 uses part of your Microsoft account address as your profile folder and internal account name. Here's how to use a custom name.
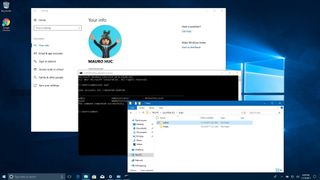
When you're creating a new account using a Microsoft account (MSA), Windows 10 uses the first five letters of your email address as the internal account name, which will be reflected in the profile folder name and when managing user accounts via command line.
Although this may not be a concern for most users, many people find this annoying because of the fact that Windows 10 doesn't provide an option to use a custom name.
However, if you want to use your real name, or a nickname, as your profile folder and internal account name, there is a workaround that allows you to set up an account with a custom name when using your Microsoft account information.
In this Windows 10 guide, we walk you through the steps to use a different name on your account, instead of just part of your MSA address.
How to set up a Microsoft account on Windows 10 with a custom name
To create an account that uses a custom profile name, you must first create a new administrator local account, move all your data, remove the old account, and finally switch to a Microsoft account.
Creating a local account
You can create a new local account on your computer using these steps:
- Open Settings.
- Click on Accounts.
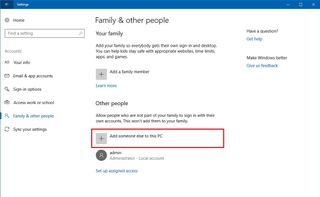
- Click on Family & other people.
- Under "Other people," click the Add someone else to this PC option.
- Click the I don't have this person's sign-in information link.
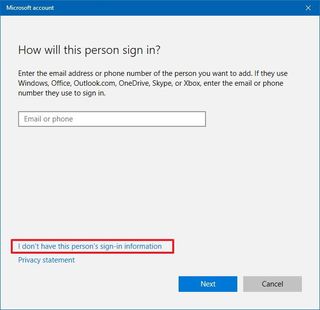
- Click the Add a user without a Microsoft account link.

- Enter the username you want to use, which will define your profile folder and internal account name.
- Enter a secure password and password hint.

- Click Next.
Changing account type
If you'll be the only person accessing the computer, it's a good idea to change the account type to include administrative rights using these steps:
Get the Windows Central Newsletter
All the latest news, reviews, and guides for Windows and Xbox diehards.
- Open Settings.
- Click on Accounts.
- Click on Family & other people.
- Under "Other people," select the newly-created account, and click the Change account type button.
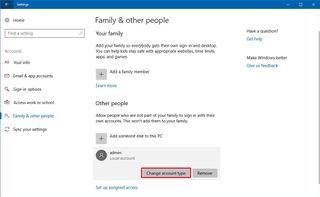
- Select Administrator using the drop-down menu.
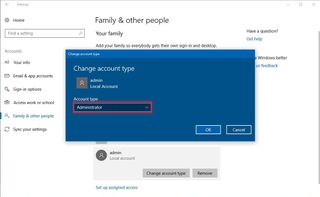
- Click OK.
- Sign-out from your current account.
Setting up a new account
Before you can connect your Microsoft account to Windows 10, you must remove your old account. Before you go through that process, you need to make sure to move all your files to the newly-created account following these steps:
- Sign-in to your newly-created local account.
- Open File Explorer.
- Select This PC from the left pane.
- Under "Devices and drives," double-click to open the C: drive.
- Double-click the Users folder.
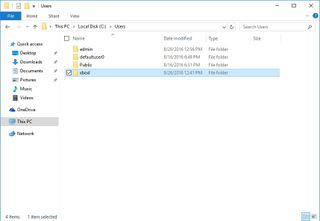
- Locate your old account's folder and double-click it. (Hint: It's the folder using the last five letters of your MSA address.)
- If you get a dialog box saying "You don't currently have permission to access this folder", click Continue, as your administrator account will grant you access.
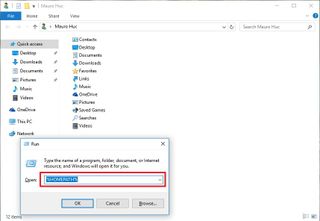
- Use the Windows key + R keyboard shortcut to open the Run command.
- Type the following command line:
%HOMEPATH%, and click OK to open a second instance of File Explorer in your default folder.
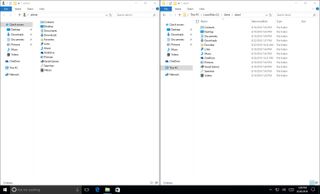
- Snap your new home folder to the left side of the screen using the Windows key + left arrow keyboard shortcut.
- When Snap assist pops up, choose to snap your old home folder to the right side.
- Move the content inside the folders in the right side (old account) to the same folders in the left (new account).
After completing the steps, make sure you can access your files and applications. In some cases, you may need to reinstall some of your apps, if they can only be installed per account. You may also have to reactivate some of them, so make sure you have the activation information handy.
Remove old account
Once you've created the local account with the new profile name, and you've transferred all your data over to the new account, you'll need to remove the old account in order to switch to a Microsoft account. Here's how:
- Open Settings.
- Click on Accounts.
- Click on Family & other people.
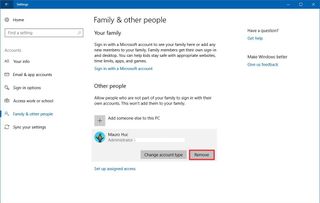
- Under "Other people," select your old account, and click the Remove button.
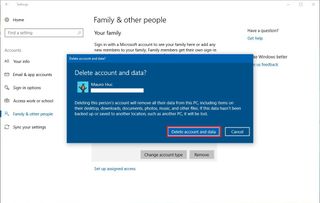
- Click the Delete account and data button.
Connect a Microsoft account
The last step to complete the process is to connect your new local account to your personal MSA with these steps:
- Open Settings.
- Click on Accounts.
- Click on Your info.
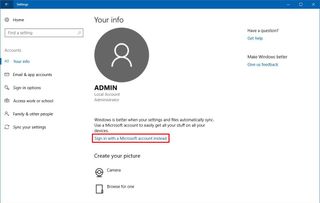
- Click the Sign in with a Microsoft account instead link.
- Enter your Microsoft account address.
- Click Next.

- Enter your password.
- Click Sign in.
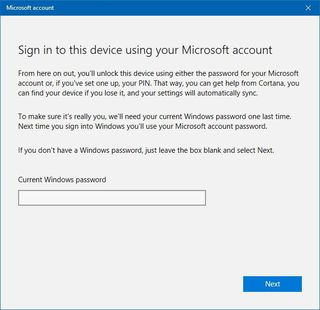
- Enter the password that you're currently using with the local account, and remember that moving forward, you'll need to enter your MSA password to sign in.
- Click Next.
After completing these steps, you can start using Windows 10 with the new custom profile name.
Wrapping things up
As you can see there quite a few steps to follow, but that's the price you need to pay to get an account with a custom folder and internal account name. Unfortunately, this is not a bug on Windows 10. It just the way it works.
If you're doing a clean installation of Windows 10, instead of creating an account using an MSA, select the Offline account option from the bottom-left corner to create a local account. Then after finishing the setup, simply connect your local account with a Microsoft account.
Do you think Windows 10 should have an option to allow to create a custom profile name, or at least use the first name associated with your Microsoft account? Tell us in the comments.
More Windows 10 resources
For more helpful articles, coverage, and answers to common questions about Windows 10, visit the following resources:
- Windows 10 on Windows Central – All you need to know
- Windows 10 help, tips, and tricks
- Windows 10 forums on Windows Central
Mauro Huculak is technical writer for WindowsCentral.com. His primary focus is to write comprehensive how-tos to help users get the most out of Windows 10 and its many related technologies. He has an IT background with professional certifications from Microsoft, Cisco, and CompTIA, and he's a recognized member of the Microsoft MVP community.

