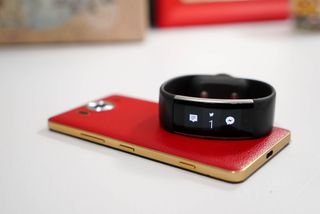
The Microsoft Band 2 keeps getting better even after several months since its release date. The latest update that was released earlier this month added a social aspect to the Band, but there was another feature that was quietly added that we're equally happy about.
The Microsoft Band 2, in conjunction with the Microsoft Health mobile app, now lets you choose which apps send you notifications. You get notifications from only the apps you care about most. We'll show you how to set it up.
- Make sure you have the latest version of the Microsoft Health app on your phone. Check the Windows Store for updates.
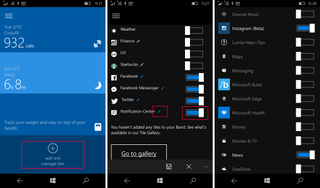
- Open the Microsoft Health app on your phone, scroll down, and tap Add and Manage tiles at the bottom.
- Enable the Notification Center tile and tap the pencil icon next to it.

- Take a look at the list and enable the apps you would like to show up in the Notification Tile on your Microsoft Band.
- When you're done, tap the back button and tap Confirm.
That's it! Previously, all the notifications on your Windows Phone get forwarded the Band. This new feature gives you more control.
This feature also fixes an annoying bug on Windows 10 Mobile that displayed my Outlook emails on both the Mail and Notification icons on my Microsoft Band 2. Now I can stop it from showing up in the Notification Tile, while still visible in the Mail tile.
The customizable app notifications is just one of the recently added features to the Microsoft Band 2, and we look forward to seeing more in the future. What would you like to see on the next update? Let us know in the comments!
Download Microsoft Health from the Windows Store

Where to buy Microsoft Band 2
Get the Windows Central Newsletter
All the latest news, reviews, and guides for Windows and Xbox diehards.

