
The Alienware Aurora is a great desktop gaming PC, combining sheer power with a small-ish form factor and a striking design. There are many configurations to choose from when you buy one, but part of the fun of owning a gaming PC is adding new bits and upgrading existing ones.
Getting inside and putting your own stamp on your Aurora is really easy. Here's a look at everything you can do and how you do it.
What you can change
Most of the stock parts can be swapped out if you should so wish:
- Graphics card
- RAM (add to or replace completely)
- m.2 SSD boot drive
- Stock cooler
What you can add
There are some empty slots on the Aurora right out of the box for you to add more parts to:
- Two x 2.5-inch SSD
- A single HDD
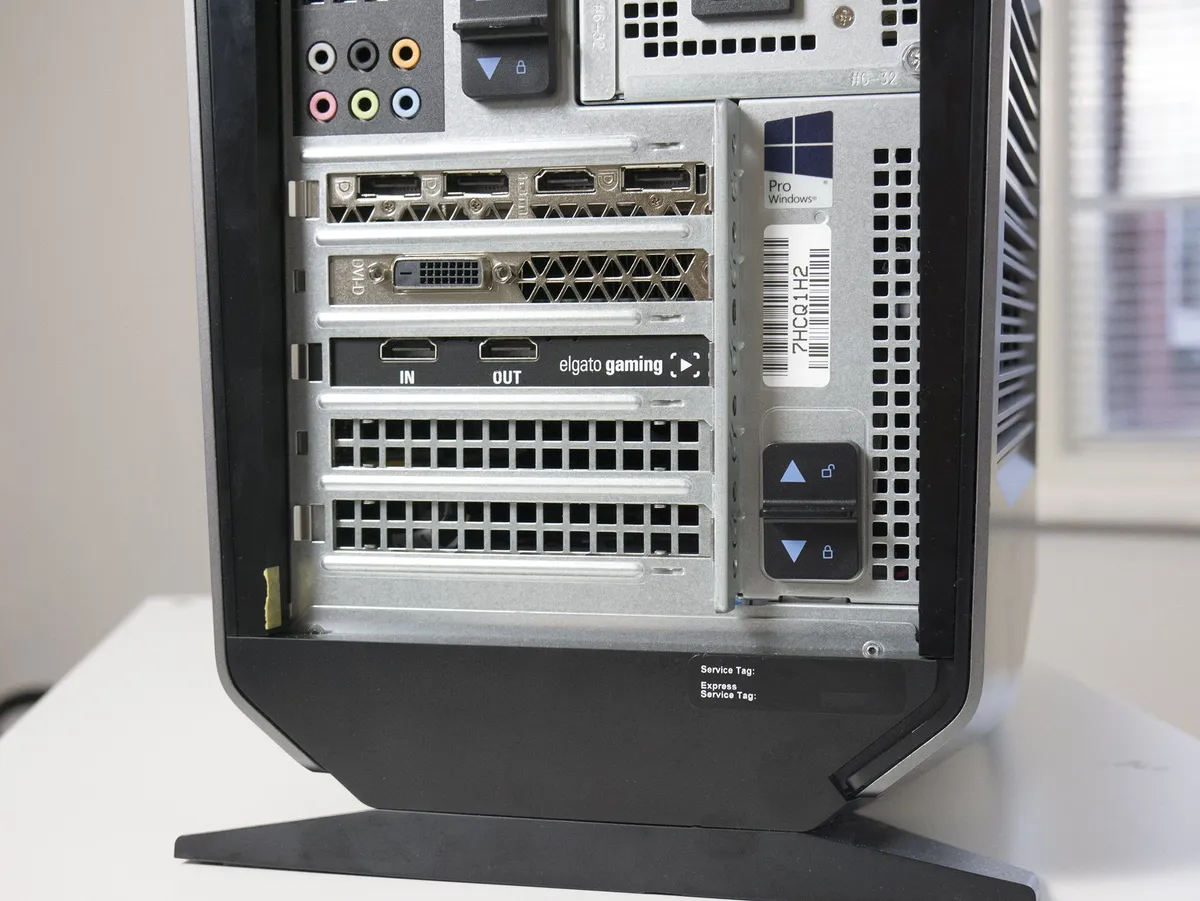
- A 'short' PCIe slot for SSD, Sound Card, Elgato HD60 Pro capture card etc
- A full sized graphics card
How to open the Alienware Aurora

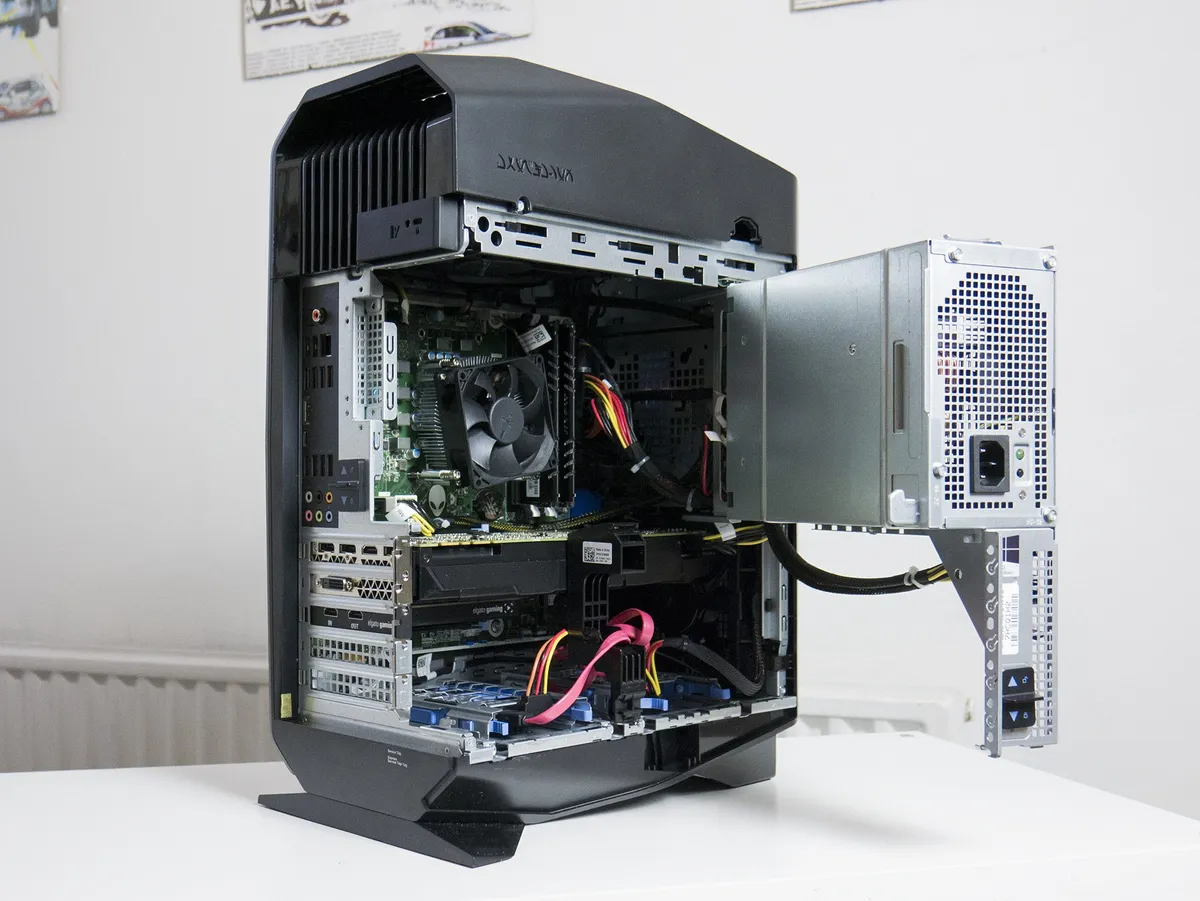
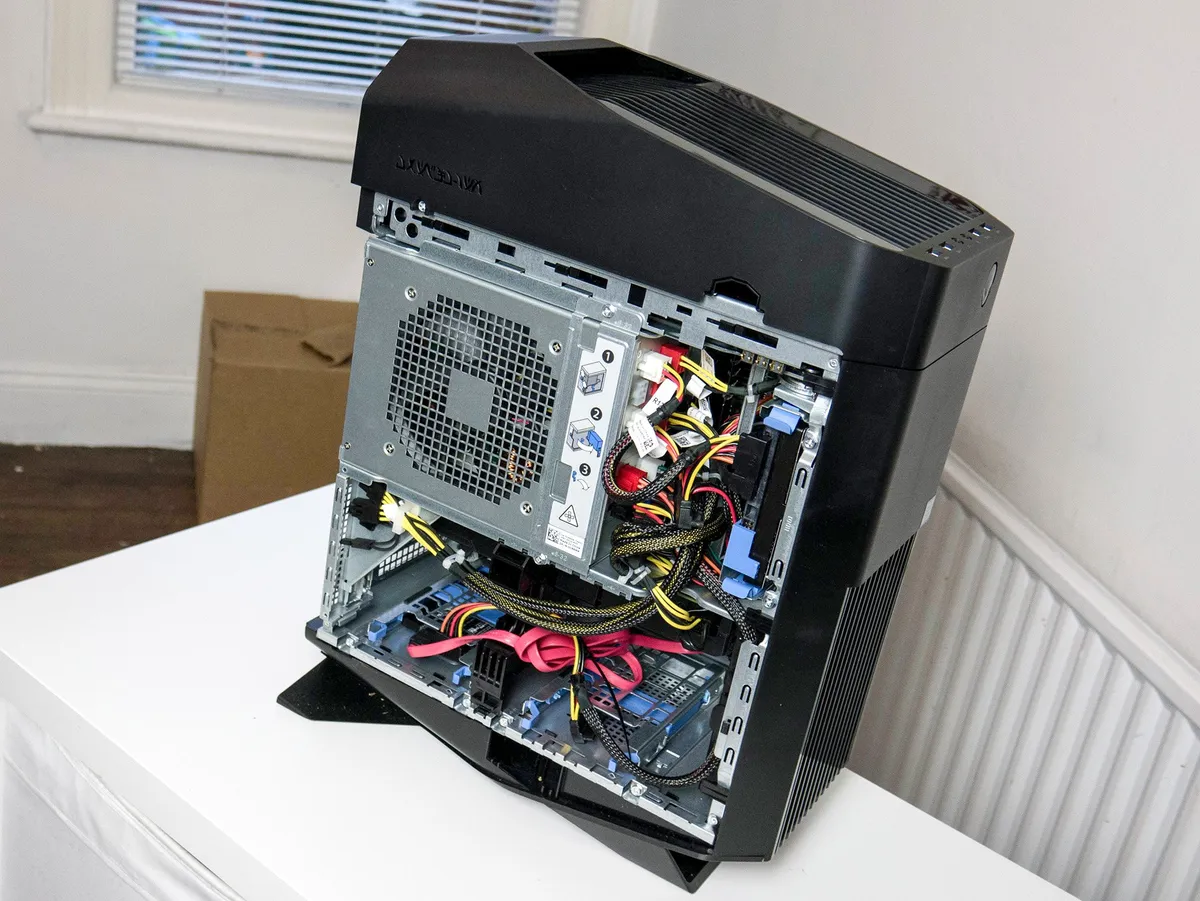
Before you can do any work to the PC, you have to get inside. It's really easy, but there are some steps to follow:
- Remove the single screw from the black handle on the rear.
- Slide both latches up.
- Pull the black handle outwards.
- Pop off the side panel with the ventilation grilles in.
- Swing out the power supply to reveal the internals of the PC.
How to add SSD and HDD storage

If your Aurora came with just the single SSD for storage, at the base of the PC case you'll have a pair of empty 2.5-inch bays, and an empty 3.5-inch bay to the right of the power supply. Adding the HDD is easiest, so we'll tackle that first:
- Squeeze the blue handles together to release the drive caddy.
- Slot the 3.5-inch HDD into the caddy.
- Make sure the four retainers on each corner have locked into the corresponding holes on the drive.
- Push the drive caddy back in.
You'll find a spare power and data cable for the HDD located somewhere around the drive bay. Both look similar, with an 'L' shaped connector, but one is much larger and you'll find it coming from the power supply. The smaller one may be tucked out of the way, so you might have to hunt around, but you can't plug the wrong cable in.

To add one or two SSDs to the Aurora you'll need to provide a SATA 3 cable yourself for each drive. From there the process is mostly the same as above:
- Squeeze the blue handles together to release the drive caddy.
- Slot the 2.5-inch SSD into the caddy.
- Make sure the four retainers on each corner have locked into the corresponding holes on the drive.
- Push the drive caddy back in.
- Connect one of the spare power connectors that pulls closest to the drive.
- Connect one end of the SATA 3 cable to the SSD.
- Connect the other end to one of the spare SATA ports towards the base of the motherboard.

Once you've hooked up your drive(s) and booted the PC back up, you'll need to instruct Windows 10 to use them as volumes before storing anything on them. You do this in the Disk Management application on your PC, where you'll set up the partition and give the drives a letter and a name to help you identify them.
How to format a new hard drive in Windows 10
If you're looking for suggestions on what drives to use, for SSDs you can't go wrong with a Samsung 850 Evo, while for HDDs give the Western Digital Blue a look for great value mass storage.
How to add more RAM and change the cooler

If you just want to top up the existing RAM with some more, assuming it came with 8GB you could just buy another set of 8GB 2133MHz DDR4 RAM as two sticks of 4GB. With four slots available you can use four sticks, and as RAM works best when used in matching pairs, you should always keep it this way.
Dealing with the RAM is simple though:
- Open up the Aurora as detailed above.
- If removing old RAM, open the catches at the top and bottom of the existing sticks.
- Carefully remove the RAM sticks.
- Line up the new RAM over slots 1 and 3 or 2 and 4.
- Line up the notch on the RAM with the notch on the slot.
- Push the RAM stick in gently until the catches click back into place.

To verify it all went to plan, open up the Settings app in Windows 10, go to system and then about. The number shown under RAM should now match the amount you just installed.
While you're in this part of the PC you could also swap out the stock cooler if you got the air cooled version of the Aurora. It's by no means an essential since it's surprisingly quiet and keeps temperatures down better than you might think. Swapping it out is fairly simple though:
- Undo the screws in each of the four corners of the cooler.
- Carefully remove the cooler, disconnecting the power cable.
- You'll likely need to add some new thermal paste to your processor before putting the new one on.
- Line up the new cooler and screw it in.
If you're getting a liquid cooler, you'll need to remove the 120mm fan above the motherboard so you can fix the radiator to it. For this you'll also need to pull the top housing of the PC case off to give you maximum access.
Because of the design of the Aurora, replacement air coolers will be tricky to find. If you're not using RAM with fancy heat spreaders on, something like the BeQuiet Shadow Rock LP low profile might work well.
How to change the graphics card (or add another)

You can add a second graphics card right out of the gate to work in crossfire or SLI (AMD or NVIDIA respectively for terminology), or if you bought a lower priced model swap out the one that's already there. The first thing you need to do is completely open up the Aurora as detailed above.
- Remove the black retaining clip circled in the image above.
- If you're adding a second graphics card, remove the bottom two metal plates next to the PCIe slots.
- The existing graphics card will just pull out, carefully.
- Pop in the new card(s) to the long PCIe slots pushing them down carefully.
- Reinsert the black retaining clip.
Boot up the PC and the first order of business is making sure you've got the latest drivers. Head over to either the NVIDIA or AMD support sites to get the latest ones for your particular graphics card. If you're in search of a new GPU, we've put together a buyer's guide with the best graphics cards available now.
How to change the m.2 SSD
If you're wanting to swap out the m.2 SSD inside the Aurora, then you're going to have to clone the drive, since it's the one Windows 10 is installed on. You'll need to do this first before you replace the drive, otherwise you're going to be starting from scratch with a fresh Windows install.
There are different ways of doing such a thing, one of which is using a piece of software called Macrium Reflect. We've got a full guide on how to do that linked below.
How to clone your PC hard drive using Macrium Reflect
Once you're happy you've cloned the drive correctly, swapping it is fairly straightforward:
- Open the PC case as detailed above.
- Remove the black graphics card retaining clip.
- Remove the graphics card from the motherboard.
- The m.2 SSD is located towards the bottom right corner of the motherboard.
- Unscrew the single retaining screw and the drive will pop up.
- Carefully remove the drive.
- Line up the new drive and gently push it into the slot.
- Screw in the retaining screw.
- Put the graphics card and retaining clip back in and close up the PC case.
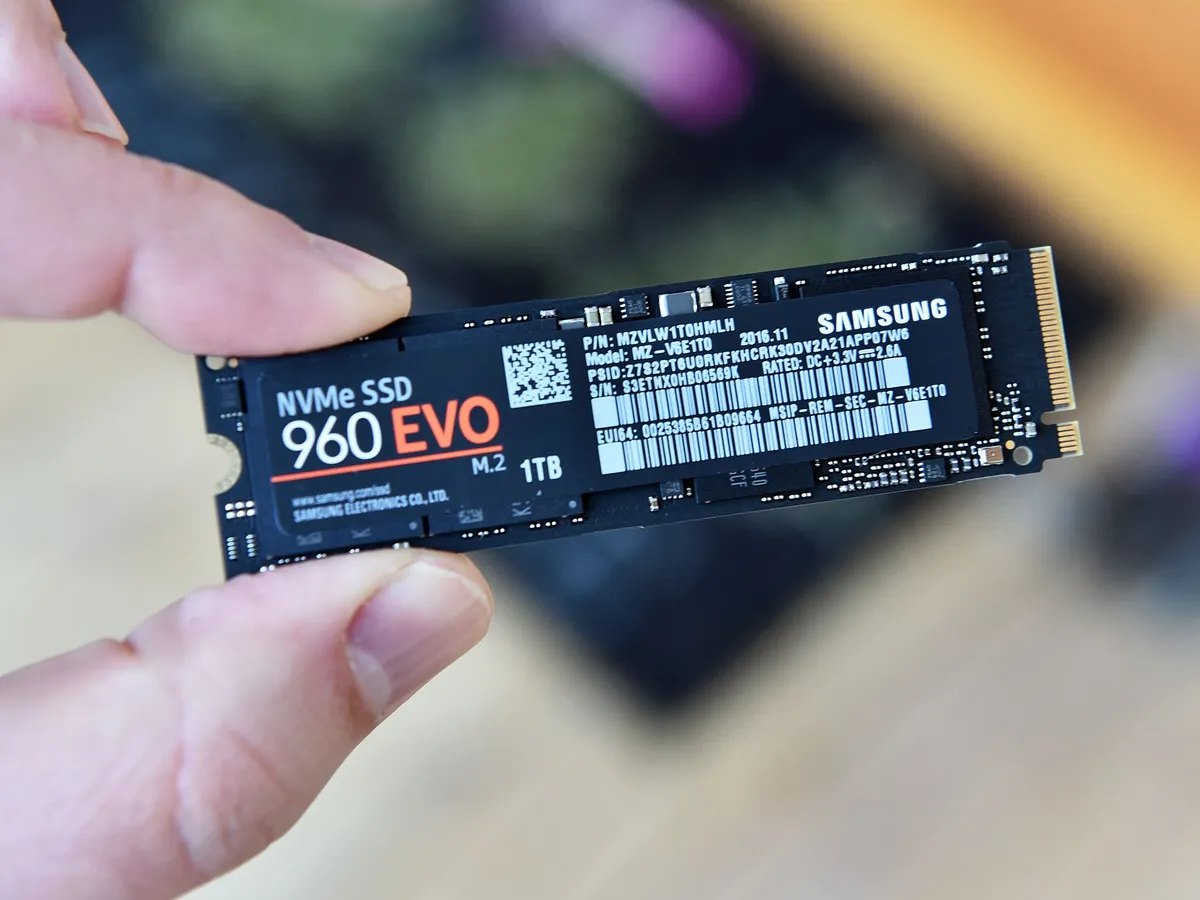
If all went to plan, when you turn on the Aurora it'll be booting up from the new drive. Dell uses a pretty good NVMe option in the Aurora, but if you want more space or even more speed, something like the Samsung 960 Evo or Samsung 960 Pro will be just the ticket. Pricey, but it's hard to do better.
That's all there is to it. It looks like a lot, but Dell has done a great job at making sure the Alienware Aurora is both accessible and easily upgraded. Something that should help prolong its life and keep the spec hungry out there happy!

