How to make an Xbox Elite controller for under $40
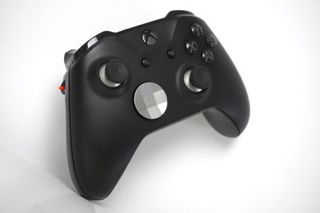
While the Xbox Elite Wireless Controller offers unrivaled control of Xbox games, its $150 price tag can be hard to justify. However, it's relatively easy to make your own spin with some of the signature features, once you know where to look for affordable parts and replacements. Here's how to assemble an Xbox Elite alternative for as low as $40.
Products used in this guide
- Parts kit: EEEKit Elite Controller Replacement Parts Kit ($25 at Amazon)
- Easy controller upgrade: Bionik Quickshot for Xbox One ($16 at Amazon)
- Grab a controller: Xbox Wireless Controller White ($60 at Best Buy)
Why you should build a DIY Xbox Elite controller
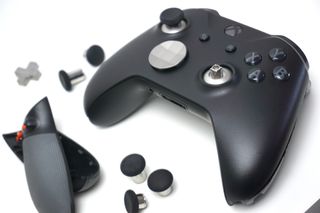
The Xbox Elite controller has led Microsoft's Xbox One controller lineup since its 2015 debut. The top-tier accessory promises an amalgamation of premium features proposed to improve your gameplay. From advanced controller customization, trigger locks, and an overall premium finish, it compiles game-changing features into a single device. However, it also bears well-documented flaws, from peeling grips, unreliable bumper buttons, and no Bluetooth connectivity. While Microsoft has since addressed many concerns with the Xbox Elite Controller Series 2, that comes at a higher $180 retail.
While the Xbox Elite remains positioned as Microsoft's flagship, building a custom Elite-style controller might be best for you. With a range of affordable third-party parts on the market, it's possible to assemble a capable setup from an existing Bluetooth gamepad. This also allows you to build a bespoke accessory, forgoing unnecessary features for a saving.
Keep in mind that performing modifications on Xbox One controllers can void any warranties.
How to install Xbox Elite thumbsticks on any controller
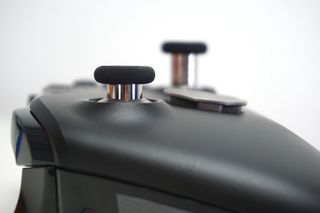
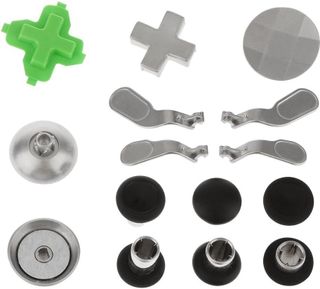
First up, we'll be installing the Xbox Elite's customizable thumbsticks, included with EEEKit's replacement kit. Its duo of magnetic thumbstick bases offers compatibility with any official controller, with support for a range of interchangeable toppers. Included are the three stock stick variants: standard, long, and domed. A handy T8 Security Torx screwdriver is also bundled for the installation.
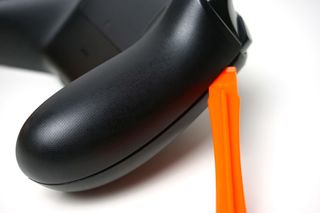
- Insert the pry tool between the controller grip and faceplate, starting near the trigger.
- Follow the outer seam with the pry tool, breaking grip panel away until detached.
- Repeat to remove the second grip panel.
- Remove the controller battery door.
- Remove batteries from the controller.
- Break the sticker inside the battery compartment to expose a screw.
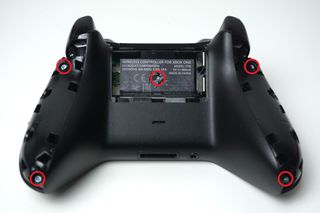
- Remove all five rear screws (highlighted above) using a T8 Security Torx screwdriver.
- Lift the front faceplate from the controller housing.
- Pull the controller thumbsticks away from the joystick modules with care. Avoid angling the sticks where possible.
- Slot the new metallic thumbsticks onto the modules.
During use, you may find the Xbox Elite thumbsticks catching shortly after installation. If this occurs, moving and clicking the thumbsticks repeatedly will ensure they're correctly seated and ready for use.
How to install an Xbox Elite D-pad on any controller
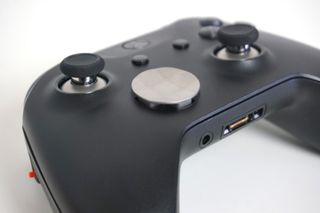
The Xbox Elite D-pad also integrates into the standard Xbox One controller with simple installation. The magnetic kit allows for the use of a standard four-way pad, alongside the Elite-exclusive plate design. With both included in the EEEKit bundle, you'll gain further customization for your setup.
Get the Windows Central Newsletter
All the latest news, reviews, and guides for Windows and Xbox diehards.
- Insert the pry tool between the controller grip and faceplate, starting near the trigger.
- Follow the outer seam with the pry tool, breaking grip panel away until detached.
- Repeat to remove the second grip panel.
- Remove the controller battery door.
- Remove batteries from the controller.
- Break the sticker inside the battery compartment to expose a screw.
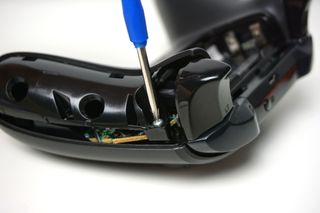
- Remove all five rear screws using a T8 Security Torx screwdriver.
- Remove the rear controller shell.
- Lift the front faceplate from the controller housing.
- Lift up the silver frame surrounding the D-pad, unhooking the clips from the bottom.
- Remove the existing D-pad.
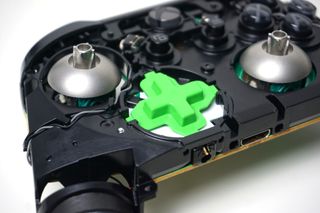
- Insert the magnetic green D-pad, ensuring it's correctly oriented.
- Re-attach the silver frame. The D-pad should click in all four directions.
- Lay the controller internals back into the rear shell.
- Re-attach the controller faceplate.
- Screw back in all five screws using a T8 Security Torx screwdriver.
- Re-attach the two controller grip panels.
How to install trigger locks on any Xbox One controller
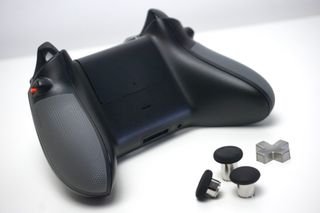
When fast-paced shooters rely on sub-second reactions, trigger locks offer a game-changing advantage. It reduces the travel time for each trigger pull and stops the controller's trigger buttons from entirely depressing. It sounds minor but saves those milliseconds for a faster rate of fire.
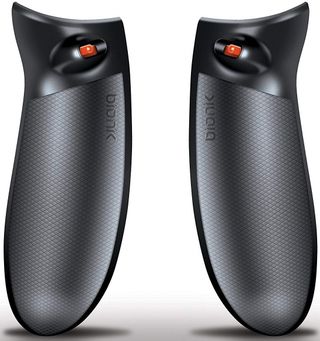
The Bionik Quickshot grips retrofit a similar stopping mechanism to standard controllers, activated via a side-mounted switch. Switching out the rear grip panels is all you need, making for a cheap and fast Xbox controller upgrade.
- Insert the pry tool between the controller grip and faceplate, starting near the trigger.
- Follow the outer seam with the pry tool, breaking grip panel away until detached.
- Repeat to remove the second grip panel.
- Firmly push down the Bionik Quickshot grips to attach them to the controller. This should offer a seamless and sturdy fit.
Take your faux-Elite to the next level
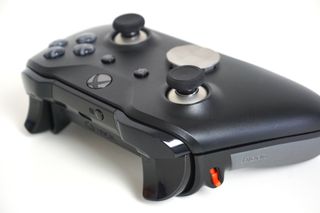
While this guide covers the essentials of an Elite-style controller upgrade, further improvements are still available. We've wrapped up the additional add-ons to consider, taking your DIY Elite controller to the next level.
For some Xbox One owners, the Elite controller's swappable paddles are an essential component of the package. These four assignable triggers provide shortcuts to in-game actions, with quick reach behind the controller. Although fitting native paddles to a standard controller requires heavy engineering, the Collective Minds $35 Xbox One Mod Pack is an easy plug-and-play solution. It presents a similar setup to Microsoft's own; however, it is limited to two paddles. Furthermore, its reliance on Micro-USB requires a constant wired connection to your Xbox console.
We also recommend two cosmetic upgrades during your Elite transformation, making for a sleeker final result. The rubberized eXtremeRate Soft Touch Controller Shell makes for a smooth in-hand feel, pairing with the Bionik Quickshot grips. We also invested in this pack of black ABXY buttons, rounding up its monochromatic finish.
Our top equipment picks
Upgrade any Xbox One controller with these Elite-inspired picks.
Make any controller an Elite masterpiece
This 15-piece set of Xbox Elite controller parts offers more value than a straightforward replacement. Compatible with official Microsoft controllers, upgrade your favorite pad with simple tinkering.
These Xbox Elite replacement parts from EEEKit also serve as an ideal upgrade for your existing Xbox gamepads. They're affordable and relatively easy to install, packaged alongside all the tools you need.
Fire faster than lighting with trigger lock grips
The Bionik Quickshot offers the easiest controller upgrade you'll find. Gain an advantage in any Xbox shooter – and it's just a clip-in grip away.
With fast installation and instant results, the Bionik Quickshot grips are a must-buy for competitive gamers on a budget.
Additional Equipment
Need the full Xbox Elite controller experience? These extra add-ons complete the package.
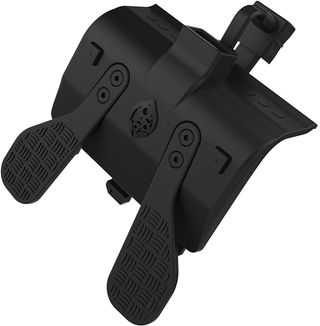
Collective Minds Xbox One Mod Pack ($35 at Amazon)
This plug-and-play kit adds paddles to any official Xbox controller for a fraction of the cost of the Elite.
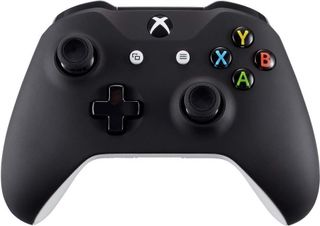
eXtremeRate Soft Touch Xbox Controller Shell ($16 at Amazon)
Its rubberized coating feels smooth in-hand, making for a subtle but striking Xbox controller upgrade.
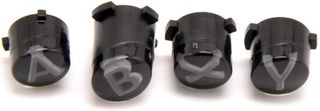
Black Xbox ABXY Buttons ($9 at Amazon)
If you're upgrading your controller, why not look the part? This black button set puts a monochromatic edge on standard colorways.
Matt Brown was formerly a Windows Central's Senior Editor, Xbox & PC, at Future. Following over seven years of professional consumer technology and gaming coverage, he’s focused on the world of Microsoft's gaming efforts. You can follow him on Twitter @mattjbrown.

